Step 1: Selecting & Cold-Trimming Your Brisket
For ultimate backyard success, you want a full Packer-Style Brisket with both the flat and the point intact. Our standard Whole Cow custom-cut briskets are perfectly portioned right around the ideal 12-15 lb weight range, which offers the highest likelihood of an even, juicy cook.
The Pro-Trim Strategy:
- Always trim your brisket while it is ice-cold straight out of the refrigerator. As beef fat hits room temperature, it becomes soft, pliable, and incredibly frustrating to slice cleanly.
- Using a sharp boning knife, trim the heavy fat cap from the bottom of the brisket, leaving a uniform ⅛- to ¼-inch layer of clean fat. This thin layer acts as a natural shield during your overnight cook, melting down continuously to baste the muscle fibers.
- Square off the edges of the flat muscle and remove the hard, dense pocket of deckle fat nestled between the flat and the point so heat can flow aerodynamic-style over the meat.
Step 2: The Seasoning Architecture
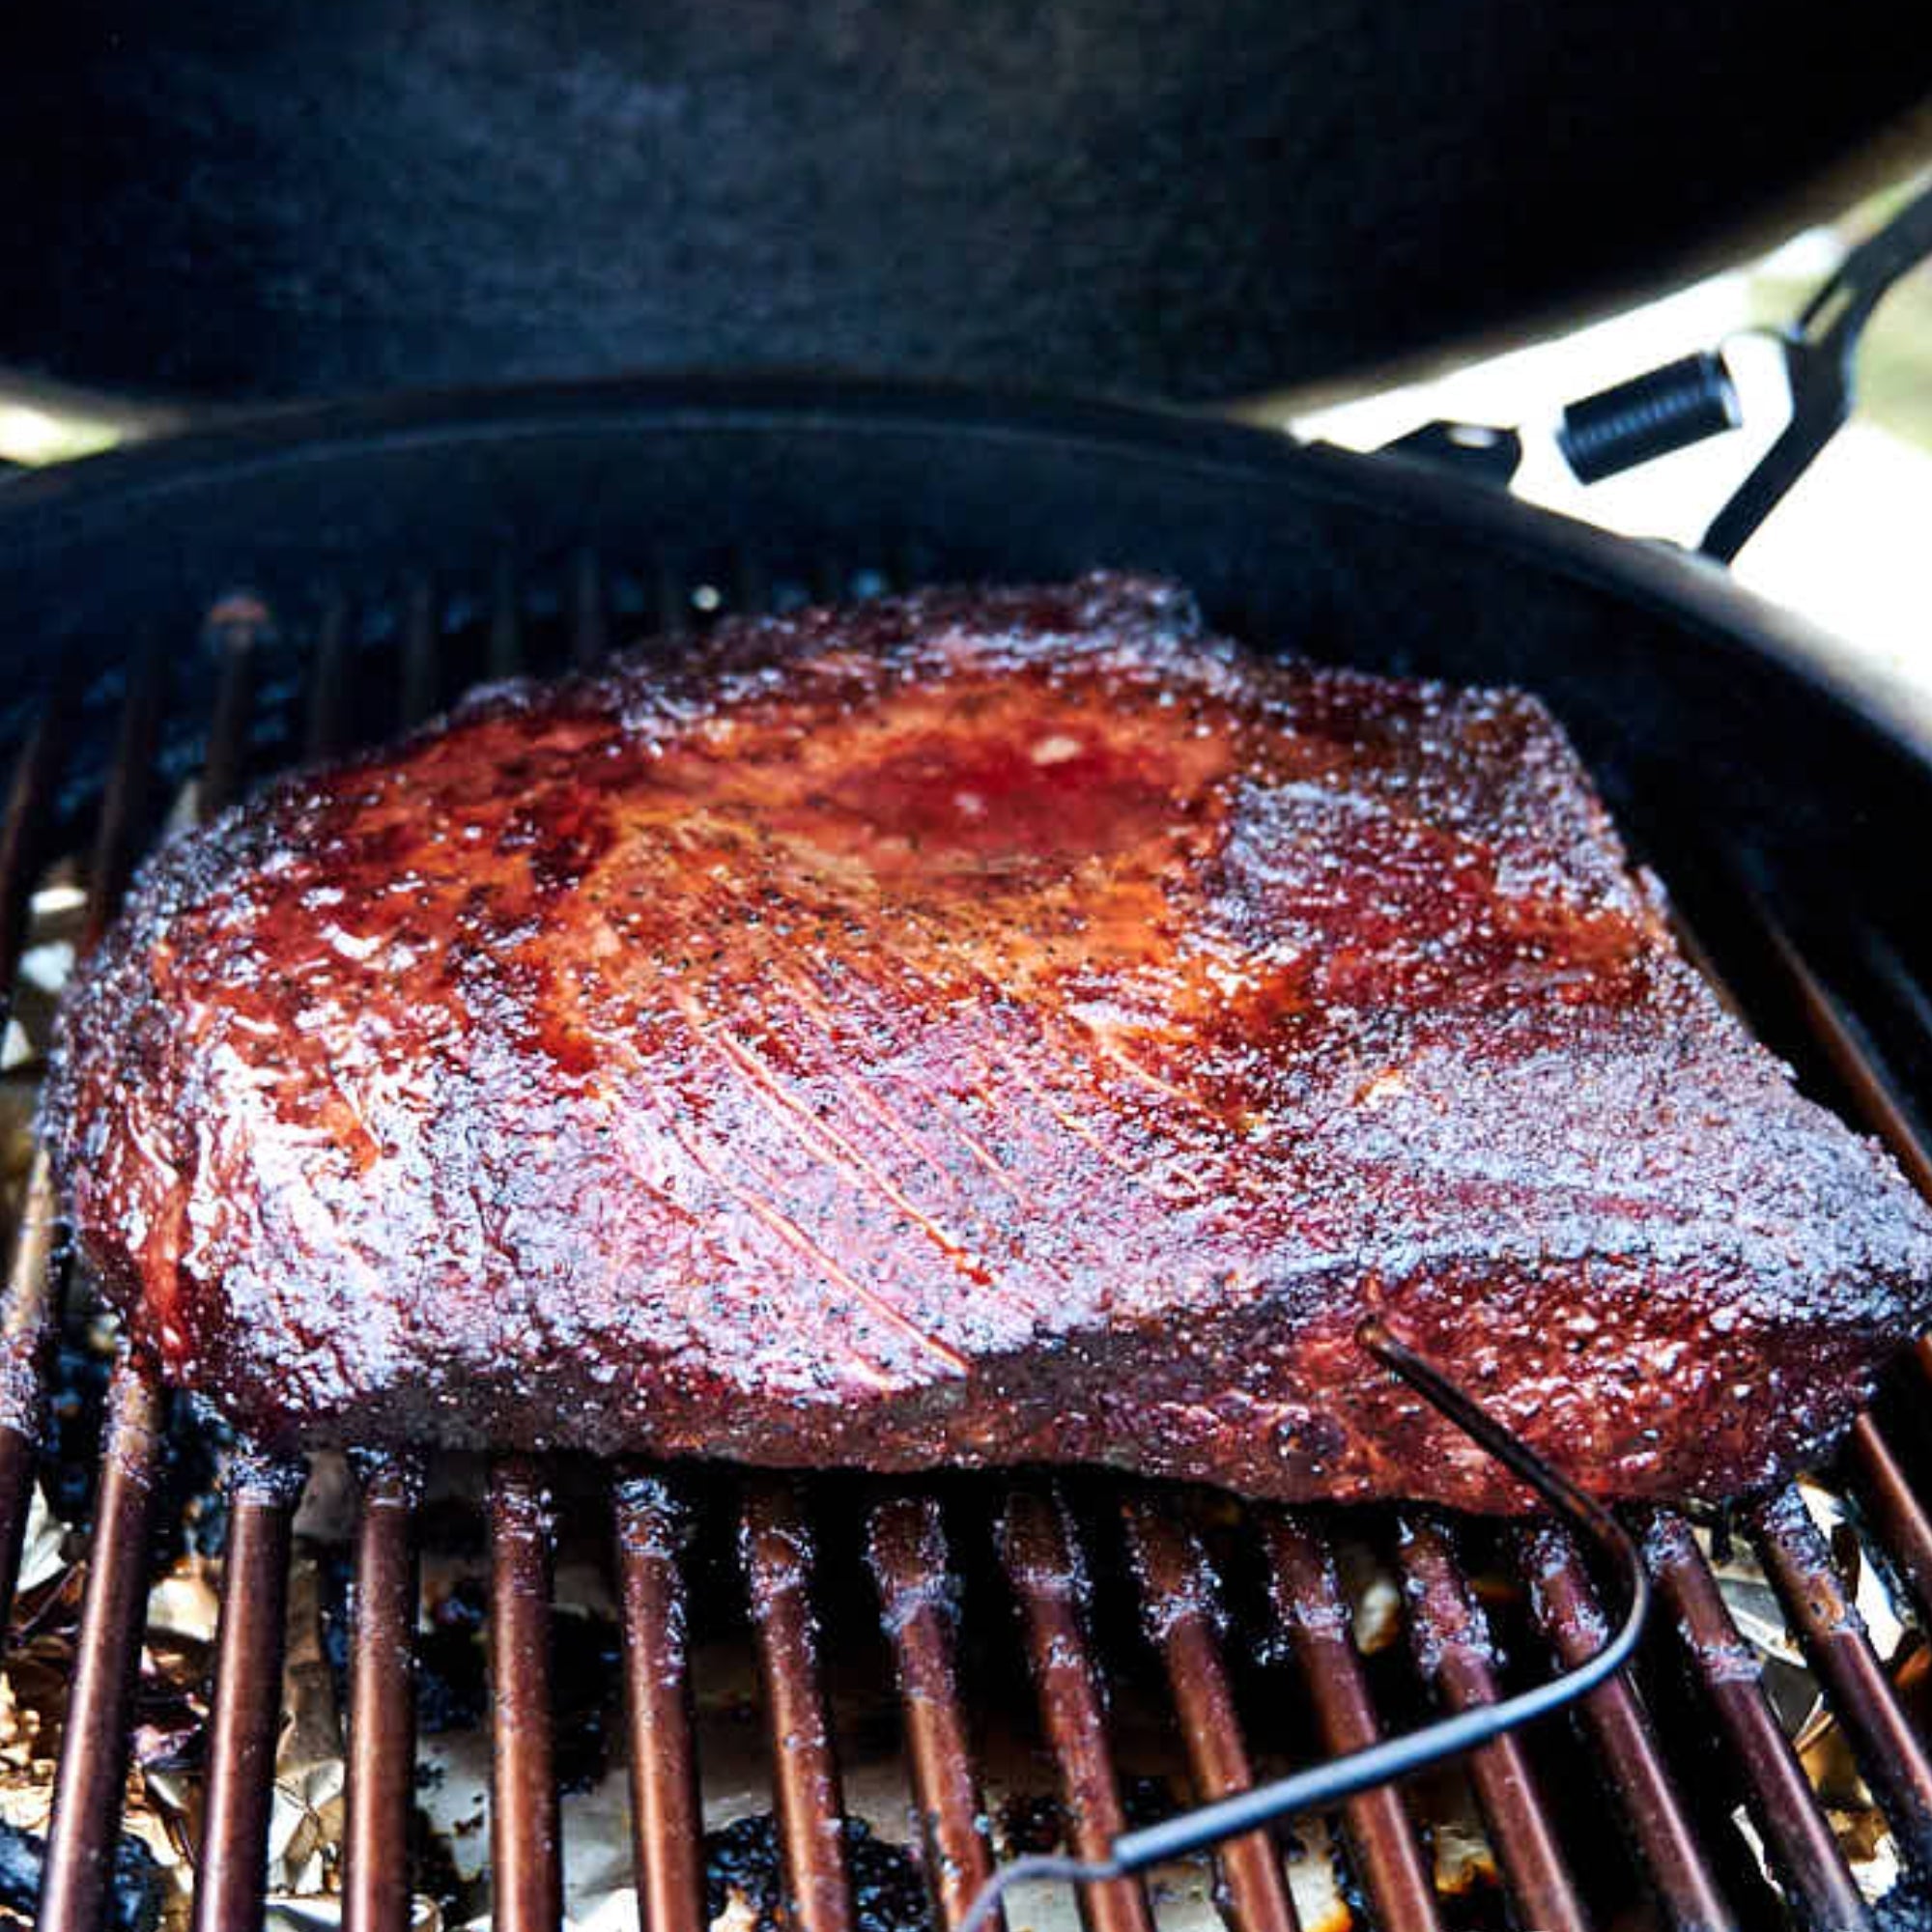
Because a whole packer brisket is an incredibly dense, thick cut of beef, you do not want to skimp on your dry rub. Generous layering is what binds with the wood smoke to build that deep, dark mahogany bark that every pitmaster craves.
- The Purist Texas Rub: We highly recommend a traditional 50/50 blend of coarse kosher salt and large-grain 16-mesh black pepper.
- The Application: Coat the trimmed brisket heavily on all sides, pressing the salt and pepper firmly into the meat texture.
- No Injections Needed: Because our Black Angus cattle feature elite, natural intramuscular marbling fat woven directly into the muscle fibers, you never need chemical moisture injections. Let the quality of our single-source Texas beef take total center stage.
Step 3: Setting Up the Smoker for the Overnight Run
The secret to a stress-free brisket is letting your smoker do the heavy lifting overnight while you sleep.
- Fueling: Load the fire bowl of your Big Green Egg completely full with high-quality lump charcoal. Intersperse 3 to 4 large chunks of seasoned Cherry or Oak wood throughout the coals. Cherry provides a gorgeous, deep crimson color to your finished bark.
- Deflection & Moisture: Place your plate setter (ConvEGGtor) down for indirect cooking. Set a wide, disposable aluminum drip tray right on top of the plate setter and fill it ¾ full with hot water or a fresh pot of black coffee. This water pan acts as a heat sink and introduces ambient humidity into the cooking dome, preventing the exterior edges of the lean flat from drying out over long hours.
- Locking the Temperature: Light the charcoal from the center, lower the grill grates, and close the lid. Adjust your top and bottom vents until your ambient temperature stabilizes at 250°F to 275°F.
Step 4: The Golden Rule — Trust Your Bark
Place your seasoned brisket onto the grates, Fat Side Up.
- Do Not Peek: Once the lid is shut, leave it entirely alone for the first 5 to 6 hours. Opening the dome early lets valuable moisture escape and dramatically drops your ambient temperature. Trust your process and let the smoke build a deep, dark bark that doesn't tear when lightly rubbed.
- The Stall & The Wrap: Around an internal temperature of 150°F to 160°F, your brisket will enter the natural "stall," where evaporative cooling stops the temperature from climbing. Once the internal temperature reaches roughly 170°F to 180°F and your dark mahogany bark is completely set, pull the meat.
- The Air-Tight Seal: Lay down two long pieces of heavy-duty aluminum foil or peach butcher paper in a "+" shape. Wrap the brisket as tightly as possible, keeping it fat side up, and place it back on the smoker grates.
Continue cooking until your internal meat thermometer probe slides into the thickest part of the flat "like warm butter"—which typically happens right between 202°F and 205°F.
Step 5: The Mandatory 2-Hour Rest
We are completely adamant that cutting a brisket early is the fastest way to ruin a brilliant cook. Your bulk beef investment has spent hours in intense heat, causing the muscle fibers to tense up.
- The Technique: Pull the wrapped brisket off the grates, wrap it tightly inside an old clean towel, and place it directly inside an empty, dry insulation cooler or a turned-off kitchen oven for a minimum of 2 to 3 hours.
- The Reward: This resting window allows the muscle structures to relax and forces the rich, melted juices to redistribute evenly back through every single slice of the flat, ensuring your first bite is melt-in-your-mouth tender.
Step 6: Slicing Against the Grain
Unwrap your rested brisket on a large wooden cutting board. Slicing correctly is paramount to texture, and you must always slice cleanly against the grain.
- The Flat: Start at the lean end of the flat and cut uniform slices roughly the thickness of a standard pencil.
- The Split Point: Once your knife reaches the thick middle section where the flat and point overlap, make a clean cut to separate them.
- The Point Rotation: Because the muscle grain direction inside the fatty point runs at a completely different angle than the flat, rotate the point 90 degrees before slicing it. This guarantees every single slice across your entire platter remains unbelievably tender, structurally cohesive, and perfectly juicy.
Enjoy the process, gather your family around the table, and taste the difference of a true, single-source Texas Prime Black Angus operation!
Share: